How-To Enable Standard Matterport Navigation Tools on Your Openhaus Tour

TRANSCRIPT: In this video, I'm going to show you how you can add the standard Matterport navigation and tools to your Openhaus tour. If you're on the main Openhaus dashboard the first thing you'll want to do is select the client for which you want to add standard Matterport navigation tools to.
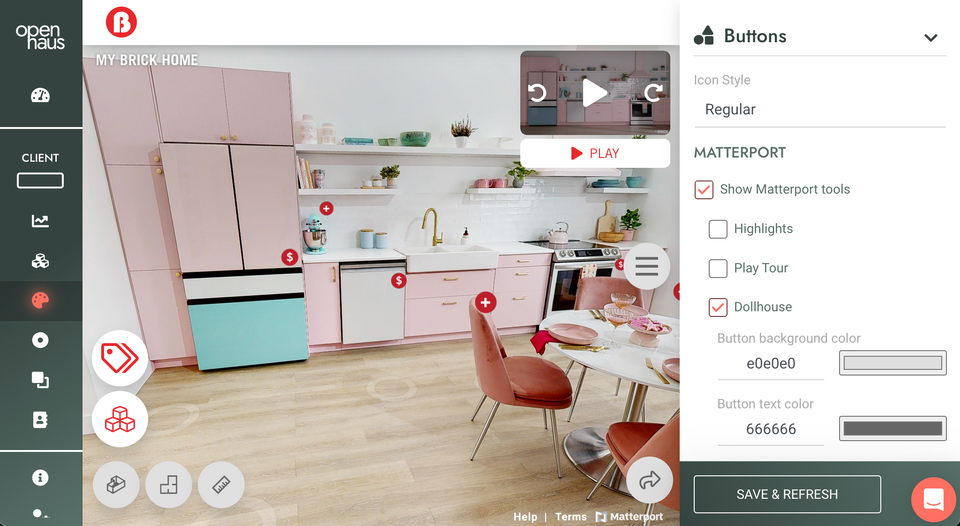
After selecting the client that you're looking to do this for go ahead and click styles here on the right hand side. You'll notice that one of the drop down options is buttons, so if I go ahead and click on it it, will give me a slew of options as far as which buttons I want to be activated on my Openhaus tour. You'll notice here that currently the 'show Matterport tools' button is not checked. If I go ahead and check it, it will show me these are the standard Matterport tools that I have available to be displayed in this tour.
If I go ahead and click save and refresh, you'll notice now that on this tour I have the same Openhaus branded UI Matterport tools available to me so now if I click this dollhouse View I can see the dollhouse of this specific tour that I am viewing. You also have the ability to pick and choose which standard Matterport tools you want to have activated. So let's say for example that I just wanted the highlights play tour and dollhouse button, but I didn't want the floor plan or the floors button. So if I uncheck those and click save and refresh, you'll notice that the last two buttons disappeared. Now I only have access to the Highlight tools and then the dollhouse View. This makes it super easy if your client wants to utilize the standard out of the box Matterport tools for their customers and they want to have those options available. You can pick and choose which ones you want here and have those buttons match the same UI or Openhaus UI that we have created. That's all, if you have any questions please let us know. Thanks!
Check out our YouTube channel for more helpful videos.
